
How to Replace Faucet Cartridge: Step-by-Step Guide
Introduction
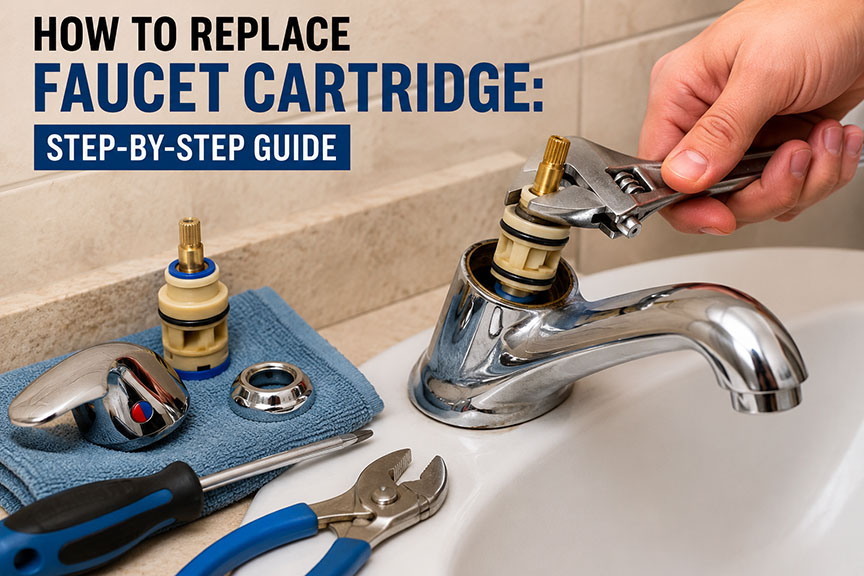
A dripping faucet is more than just an annoyance—it can waste water, increase your utility bill, and eventually lead to bigger plumbing problems. Fortunately, learning How to Replace Faucet Cartridge is a practical DIY skill that can restore your faucet’s performance without calling a plumber. Whether your faucet leaks, has low water pressure, or becomes difficult to turn, replacing the cartridge is often the solution. This guide walks you through every step, helping you complete the job safely, efficiently, and with confidence.
What Is a Faucet Cartridge?
A faucet cartridge is an internal valve that regulates water flow and temperature in many modern faucets. Unlike older compression faucets that use rubber washers, cartridge faucets rely on a precision-engineered cartridge to control water movement.
Over time, minerals, debris, and normal wear can damage the cartridge, causing leaks or poor performance. Replacing the cartridge instead of the entire faucet is usually a cost-effective and straightforward repair.
Signs Your Faucet Cartridge Needs Replacement
Before beginning the repair, identify whether the cartridge is actually causing the issue.
Common symptoms include:
- Water dripping even when the faucet is fully closed
- Difficulty adjusting hot and cold water
- Reduced water flow
- Stiff or loose faucet handle
- Inconsistent water temperature
- Water leaking around the faucet handle
If these symptoms appear after years of regular use, the cartridge is often the component that needs replacing.
Tools and Materials You’ll Need
Gather everything before starting the project.
Essential Tools
- Adjustable wrench
- Phillips screwdriver
- Flat-head screwdriver
- Allen (hex) wrench
- Slip-joint pliers
- Needle-nose pliers
- Utility knife (if necessary)
Materials
- Replacement faucet cartridge (matching your faucet model)
- Silicone plumber’s grease
- Clean cloth or towel
- White vinegar (for mineral buildup)
- Small container for screws and parts
Step 1: Turn Off the Water Supply
Locate the shutoff valves beneath the sink and turn both clockwise until fully closed.
If your faucet doesn’t have local shutoff valves, turn off the home’s main water supply.
Open the faucet afterward to:
- Release remaining water pressure
- Drain excess water
- Confirm the water supply is off
Place a towel inside the sink to prevent small parts from falling into the drain.
Step 2: Remove the Faucet Handle
Every faucet is slightly different, but most handles are secured using one of the following:
- A visible screw
- A decorative cap hiding a screw
- A small Allen screw underneath
Carefully remove the screw and lift the handle straight upward.
If mineral deposits make it difficult to remove, gently wiggle the handle instead of forcing it.
Step 3: Remove the Retaining Nut or Clip
After removing the handle, you’ll usually find one of these:
- Retaining nut
- Retaining clip
- Locking ring
Use the proper tool to remove it carefully.
Keep every part in order so reassembly becomes easier later.
Step 4: Pull Out the Old Cartridge
Grip the cartridge firmly.
Pull it straight upward.
If it’s stuck because of mineral buildup:
- Twist gently left and right
- Use cartridge puller tools if necessary
- Avoid excessive force that could damage the faucet body
Take note of the cartridge’s orientation before removing it.
Some cartridges only fit one way.
Step 5: Clean the Faucet Body
Before installing the replacement cartridge, clean the inside thoroughly.
Remove:
- Dirt
- Sediment
- Calcium deposits
- Rust particles
A soft cloth and white vinegar work well for dissolving mineral buildup.
Cleaning this area helps the new cartridge seal properly and improves faucet performance.
Step 6: Install the New Cartridge
Compare the new cartridge with the old one.
Check that:
- Size matches
- Shape matches
- Stem alignment is identical
- O-rings are correctly positioned
Apply a thin layer of silicone plumber’s grease to the O-rings.
Insert the cartridge in the exact same orientation as the original.
Never force it into place.
Step 7: Reassemble the Faucet
Reverse the disassembly process.
Reinstall:
- Retaining clip or nut
- Decorative cap
- Faucet handle
- Handle screw
Tighten securely but avoid overtightening, which may crack plastic components.
Step 8: Turn the Water Back On
Slowly open both shutoff valves.
Allow water to flow for several minutes.
Inspect carefully for:
- Leaks around the handle
- Dripping from the spout
- Smooth handle movement
- Proper hot and cold water operation
If everything functions correctly, the repair is complete.
Common Mistakes to Avoid
Many DIY repairs fail because of simple mistakes.
Avoid these common errors:
- Purchasing the wrong replacement cartridge
- Forgetting to shut off the water
- Losing small retaining clips
- Installing the cartridge backwards
- Using petroleum grease instead of silicone plumber’s grease
- Overtightening retaining nuts
- Skipping faucet cleaning before installation
Taking your time helps prevent unnecessary frustration.
How to Identify the Correct Replacement Cartridge
Not every cartridge fits every faucet.
To ensure compatibility:
- Check the faucet manufacturer’s name.
- Locate the faucet model number.
- Bring the old cartridge to a hardware store.
- Compare dimensions carefully.
- Consult the manufacturer’s replacement guide.
Many brands use proprietary cartridge designs.
Popular Faucet Brands and Cartridge Differences
Several manufacturers use unique cartridge systems.
Examples include:
- Moen
- Delta
- Kohler
- American Standard
- Pfister
- Grohe
Always purchase the replacement recommended for your specific faucet model.
How Long Does a Faucet Cartridge Last?
A quality faucet cartridge typically lasts:
- 5–15 years under normal household use
Its lifespan depends on:
- Water quality
- Mineral content
- Frequency of use
- Proper maintenance
Hard water may shorten cartridge life due to mineral buildup.
Tips for Extending Cartridge Life
Simple maintenance helps prevent future problems.
Best practices include:
- Clean faucet aerators regularly.
- Install a water softener in hard-water areas.
- Avoid forcing faucet handles.
- Remove mineral deposits periodically.
- Fix small leaks promptly.
Routine maintenance reduces wear on internal components.
When Should You Call a Professional?
DIY replacement works well for many homeowners, but professional assistance may be necessary if:
- Shutoff valves don’t work
- Pipes begin leaking
- The faucet body is cracked
- The cartridge is permanently seized
- Water continues leaking after replacement
- Plumbing connections are damaged
A licensed plumber can diagnose underlying issues that extend beyond the cartridge itself.
Helpful Resource
For additional plumbing guidance and water conservation tips, visit the U.S. Environmental Protection Agency’s WaterSense program:
https://www.epa.gov/watersense
FAQs About How to Replace Faucet Cartridge
How do I know if my faucet cartridge is bad?
Common signs include dripping water, difficulty adjusting temperature, low water pressure, or a stiff faucet handle. If these issues persist after cleaning the aerator, the cartridge is often the cause.
Can I replace a faucet cartridge without turning off the water?
No. Always shut off the water supply before removing the cartridge to prevent flooding and potential water damage.
Do all faucets use the same cartridge?
No. Cartridge designs vary by manufacturer and model. Always match the replacement cartridge to your specific faucet.
Why is my new cartridge still leaking?
Possible causes include incorrect installation, damaged O-rings, debris inside the faucet body, or using the wrong replacement cartridge.
Is replacing a faucet cartridge cheaper than replacing the faucet?
Yes. In most cases, replacing the cartridge is significantly less expensive than installing a new faucet and can restore normal performance.
Conclusion
Replacing a worn faucet cartridge is one of the most practical home plumbing repairs that homeowners can perform with basic tools and a little patience. By following the proper steps, using the correct replacement part, and maintaining your faucet regularly, you can eliminate leaks, improve water flow, and extend the life of your fixture. Learning How to Replace Faucet Cartridge not only saves money on plumbing services but also gives you the confidence to tackle future household maintenance projects.
Read Also: Zimmerkamine Guide: Types, Benefits, and Design Tips